Online slots for real money are the backbone of any casino platform. With some sites offering hundreds or even thousands of options, knowing what reels to spin is not always easy.
We’ll cover what makes the best online slots, including factors such as the RTP, the aesthetic presentation, the entertainment value, and the potential for winnings. We also unveil the top slots casinos where you can play right now.

- No fees on deposits and withdrawals
- Unlimited matching for crypto deposits
- Great bonuses for sports and casino players

- Massive RTG game collection
- Free entry to several tournaments
- 45% cashback every week

- Deposit match bonuses every day of the week
- Great selection of jackpots and crash games
- Very fast sign up

- Ongoing slot tournaments with prizes topping $3,000
- Credit card and crypto payments available
- Huge choice of table games and slots

- Great perks for VIP members
- 50% cashbacks every week
- Wide range of slots and table games

- 25% cashback
- 24/7 customer support
- Over 400+ thrilling games

- 10% weekly casino rebate
- Standard & elite crypto welcome bonus
- Great selection of blackjack games

- Exclusive games
- Several bonuses
- Scratch cards and live casino

- 500+ exciting games
- Huge bonuses
- Quick and reliable payouts

- Various reload bonuses
- Join Xbet blog for more previews & tips
- Safe & fast crypto payments


Online slots in the USA come in countless forms, with some of the most popular picks being Buffalo Wild Power, Pop the Bank, Wanted Dead or a Wild, Gates of Olympus, Duel at Dawn, Gold Nugget Rush, Triple 7s, and Dragon Fortune Frenzy.
These slots online have high ratings and are featured on the top sites in the US.
They offer immersive themes with extra bonus features, including free spins and wilds.
You can easily play and select the bet from just a few cents per spin, up to over $100.
Payouts are fair and instantly added to your account as soon as you win.
Best Slot Sites Overall: BetWhale vs Raging Bull
-

- BetWhale Casino

-
- Raging Bull Casino

- Slots Welcome Bonus: Raging Bull wins thanks to the exclusive 350% welcome bonus that includes an extra 50 spins.
- Number of real money slots: BetWhale is well ahead with over 1,500 slots on the site right now.
- Providers: BetWhale has games from tens of slots developers, while Raging Bull is mostly powered by RTG.
- Promotions: Raging Bull has bigger reload bonuses, where you can benefit from more funds and free spins.
- Payout speed: BetWhale wins with faster processing, allowing you to withdraw within 24 hours.
Pick BetWhale Casino if… you want a large slots collection provided by leading developers, along with fast withdrawals.
Pick Raging Bull Casino if… you prefer large bonuses for playing the best slots from Realtime Gaming.
Types of Online Casino Slots
The best online casinos in the US ensure that you have a variety of slots to play and enjoy, ranging from classics to immersive video slots with 3D animations. Not only do the visuals vary, but so do the bonus features found inside. Let’s go over the different types of real money slots available online and see which ones you like the most.
Classic Slots
The classic slots theme is based on old-school slot machines from land-based casinos. These often feature symbols depicting various fruits, along with gold bells, BAR, and the lucky number 7.
Also known as fruit machines, classic online slots are known for having simple gameplay with limited bonus features. While some can have scatter symbols and even wilds, this is not the norm. Most classics are also played on three reels, but there are also plenty of games in this category that have the standard 5×3 layout.
Is 7 your lucky number? Play the classic slots game 777 at Raging Bull Casino. It has three reels, a single payline, and a progressive jackpot.
Prefer something more appetizing? Fruity Spins at BetWhale has all the classic symbols and an extra bonus feature for more wins.
Video Slots
Video machines account for most real money slots online. These are the modern creations that stand out with their detailed images and animations. They often have immersive themes with various characters and can tell stories as you spin the reels and trigger bonus features.
And on the topic of bonuses, video slots generally have a mix of elements meant to break up the monotony of just spinning the reels. These can include special wild symbols, free spins, pick-me bonus games, bonus wheels, expanding reels, and more.
Ready to fight off vampires? Play Blood Suckers II on BC.Game Casino and enjoy the detailed visuals and themed bonus features.
Looking for something with cowboys? Duel at Dawn is a thrilling real money slots game with multipliers up to 200x during the Duel Reels features.
Progressive Slots
Online slots for real money can have progressive jackpots that increase with every bet. Based on the starting amount and game mechanics, some jackpots can exceed $1 million before they are claimed. This makes them very exciting as every spin has the potential to award a life-changing payout.
Progressive slots with smaller jackpots are also worth checking out as they award the prizes more often, even if they are only worth a few thousand dollars. Whatever you prefer, the best online slots sites have you covered with jackpots for every level.
Want to play for the biggest jackpots? Mega Moolah is a progressive jackpot slots game known for awarding record-breaking jackpots that can exceed $20 million.
Want more jackpots to choose from? Raging Bull has tens of progressive jackpot slots that frequently award prizes ranging from $1,000 to over $5,000.
Feature Buy-in Slots
Some real money online slots let you buy bonus features, like free spins, for a set multiplier of the bet. This way, you don’t have to wait around for the feature to trigger randomly and can jump right into the action.
Some of the best slot sites have dedicated categories for buy-in games in the lobby, making it easier for players to find these options.
Want the best variety of buy-in slots? Wild.io has more than 1,000 feature buy-in games, covering online slots from top developers.
Not sure where to start? Sugar Rush 1000 is a great pick where you can buy free spins and super free spins at any time.
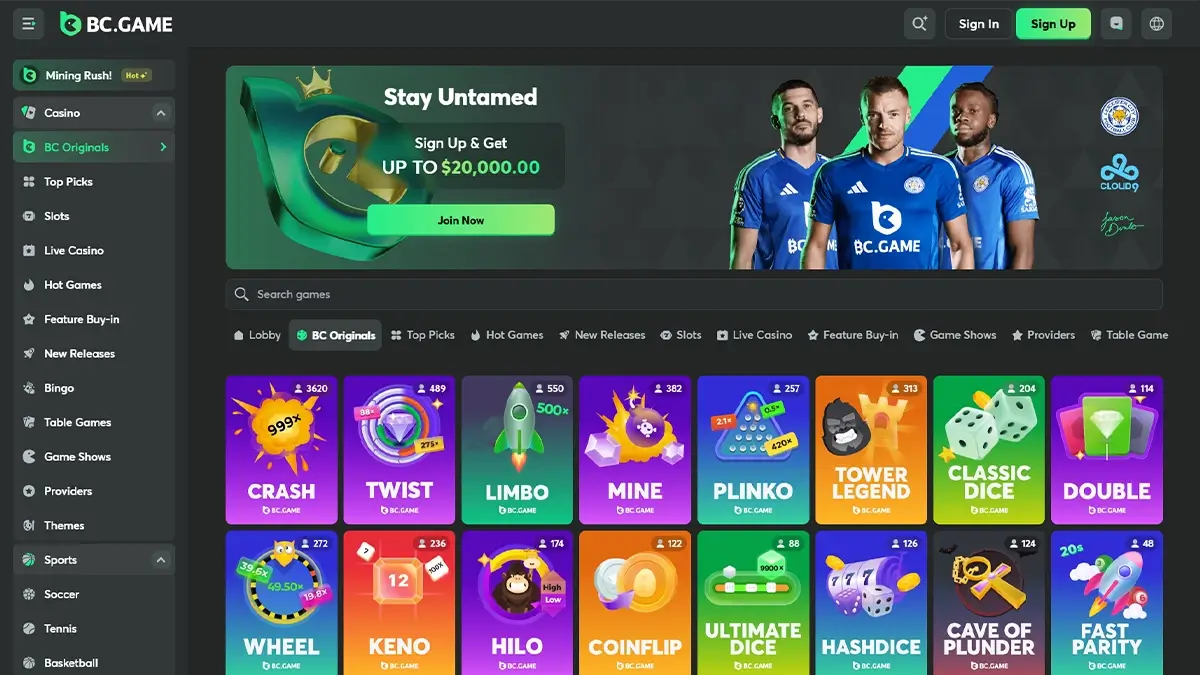
Best Online Slot Sites for Games: BC.Game vs Wild.io
-
- BC.Game
-
- Wild.io
- Game Variety: BC.Game takes the win with its 10,000+ library of games against the 7,000+ titles listed at Wild.io.
- Original Games: BC.Game wins again with 50+ “BC Originals” games compared with the 13 “Wild Originals”.
- Choice of Slot Providers: BC.Game clinches victory with 83 slot providers listed compared to 62 at Wild.io.
- New and Trending Titles: Wild.io has a “New Releases” category that showcases new and popular real money slots.
- Suitability for High-Stakes Players: Wild.io is victorious with a host of high-stakes slots and monthly payout limits of up to 10 BTC.
Pick BC.Game if… you crave slot variety and are keen to immerse yourself in provably fair games.
Pick Wild.io if… you’re a high-stakes, high-volume slot player, looking for the biggest withdrawal limits.
Best Online Slot Bonuses and Promotions
Many of the best online slot sites offer rewards to new and regular players that are eligible for use on your favorite real money slots. Here’s a rundown of the most common casino bonuses.
Welcome Bonus
A welcome bonus is the first reward as a new customer. Think of it as a “thank you” for signing up.
- Top Pick: Get up to $7,000 in bonus funds from Black Lotus Casino.
- Ease of Use: ⭐⭐⭐⭐⭐(5/5) Usually triggered as soon as you’ve made your first real-money deposit upfront.
Cashback
Many top slot sites will commit to refunding a percentage of your net losses every week/month in bonus credits.
- Top Pick: Slots of Vegas offers up to 50% cashback every week.
- Ease of Use: ⭐⭐⭐⭐⭐ (5/5) An automated bonus, with the casino calculating the net loss every week or month.
Free Spins
Receive free spins as part of welcome or reload bonuses and as ad-hoc promotions, eligible for use on specific slot games.
- Top Pick: BC.Game gives out 400 free spins as part of its welcome bonus.
- Ease of Use: ⭐⭐⭐⭐⭐ (5/5) Receive free spins credited to your account, for use on eligible slot titles.
Reload Bonus
Reload offers are additional deposit match bonuses. It’s a player retention ploy, designed to encourage you to add more funds to your account.
- Top Pick: OCG offers 100% deposit-match reload bonuses daily.
- Ease of Use: ⭐⭐⭐⭐ (4/5) You need to visit the cashier to reload your account a second time – and make sure any promo codes are added.
No Deposit Bonus
Get bonus funds credited to your account without even having to make a real money deposit upfront. No deposit bonuses are typically much smaller than deposit match bonuses.
- Top Pick: Raging Bull Casino has been known to credit no deposit offers via their onsite inbox.
- Ease of Use: ⭐⭐⭐ (3/5) Bonus is usually credited immediately upon sign-up, but there are more restrictions attached to no-deposit offers.
Loyalty Program
Be rewarded for consistent slot play with exclusive perks as part of an online slot site’s VIP loyalty program.
- Top Pick: Wild.io has a notorious VIP program worth up to $75,000 in level-up loyalty benefits.
- Ease of Use: ⭐⭐⭐⭐⭐ (5/5) Many of the best real money slot sites will automatically enrol you in their VIP or loyalty programs.
Best Slots Sites for Bonuses: Lucky Red vs Black Lotus
-
- Lucky Red

-
- Black Lotus
- Welcome Bonus: Black Lotus takes the win with a 200% sign-up offer up to $7,000, compared with a 400% deposit match up to $4,000 with Lucky Red.
- Fairness of Terms: Lucky Red wins with 50x wagering requirements compared to 60x wagering requirements to rollover Black Lotus bonus funds.
- Ongoing Promotions: Black Lotus offers daily promotions in its marketing arsenal, with cashback, reload, and happy hour bonuses, and more.
- VIP Club: The Black Lotus VIP Crypto Elite Club wins as crypto depositors can bag daily 200% reload bonuses plus additional perks.
- Bonus Suitability for High Rollers: Black Lotus has the biggest welcome bonus, so naturally suits high rollers best.
Pick Lucky Red if… you’re looking for a welcome bonus that has the best chance of converting into withdrawable cash.
Pick Black Lotus if… you want to land the biggest bonuses and benefit from regular additional perks as a loyal slot player.
What Makes the Best Online Slots for Real Money
Five key ingredients make an online slot popular amongst slot players. Below, we delve into the core features of the best slots to play online for real money payouts.
Themes and Visuals
These ingredients are what first entice players to specific slot games. From pop culture themes to ancient history, mythology, and outer space, modern slots bring it all. They work hard to deliver immersive designs and animations, along with high-definition (HD) audio effects that make every spin a unique experience.
Game Mechanics
The mechanics of an online casino slot define how it functions from spin to spin. We’re talking paylines, reels, and winning combinations. You can also throw the different types of symbols into the mix, whether it’s wilds, scatters, expanding symbols, or multiplier symbols.
Clever game engines like Megaways also have the potential to magnify your payout potential. All of these help to keep you engaged from spin to spin.
Bonus Games
Most modern-day slots now have at least one bonus game. It helps to create a sense of console-style game progression, advancing your way from base game spins to the “boss level” bonus round. The most popular bonus games are free spins, pick’em bonus screens, and “Wheel of Fortune”-style spins.
RTP and Volatility
Return-to-Player (RTP) percentages and volatility levels also indicate the payout frequency and style of real money slots. RTPs demonstrate the likely long-term payout percentage relative to your stake. While volatility gauges risk versus reward, with low volatility usually paying out smaller, more frequent wins. High volatility games pay out bigger wins infrequently.
Mobile Compatibility
Today’s slot players want the flexibility to play wherever they are, any time of the day or night. The best real money slot developers now build with a mobile-first mentality, ensuring seamless, optimized action no matter the screen size.
Highest Payout Online Slots in the US
If your primary motivation for playing real money slots online is to chase regular wins, you’ll be pleased to know there are several games programmed to pay out frequently. Here’s a snapshot of the top-paying online casino slots in the industry right now.
| Real Money Slots | RTP | Volatility | Max Win |
|---|---|---|---|
| Ugga Bugga | 99.07% | Low | 1,000x |
| Book of 99 | 99% | High | 5,000x |
| 1429 Uncharted Seas | 98.60% | Low | 670x |
| Marching Legions | 98.12% | High | 10,000x |
| Money Cart 2 | 98% | High | 5,000x |
Real Money Slots vs Free Slots
If you’re undecided whether playing slot games that pay real money prizes is worth it compared with free play slots, check out the pros and cons for yourself below.
| Feature | Real Money Slots | Free Slots |
|---|---|---|
| Win Real Cash | Chance to win payouts in fiat or cryptocurrency | No option - only virtual credits |
| Jackpots | Play for fixed and progressive jackpots | Not available |
| Bonuses | Eligible for free spins and other rewards | Rarely offered, if only by social casinos |
| Gameplay | Immersive action when there’s money on the line | Limited engagement |
| Demo Mode | Not always offered | Useful for learning the ropes |
| Risk Factor | Adequate bankroll management is needed to stake responsibly | No chance of losing your own money |
You can also consider playing slots for free on sweepstakes casinos. These gaming sites use different currencies, like Gold Coins, that you can get for free.
Features of the Best Real Money Slots
If you’re unfamiliar with the nuts and bolts of fun and fluid slot games that pay real money prizes, here’s a rundown of the key components.
This popular symbol can act as any base game symbol to help complete winning paylines or win ways – and multiply your payouts too.
A scatter is your golden ticket to entering bonus features like free spins rounds. Land a set number of scatters on the same spin to trigger the feature.
This is the key to winning spins on real money slots. The best slot sites will offer games with either fixed paylines or fluid win ways. With fixed paylines, you must land matching symbols along the entire payline to win. With winways, you need to build clusters of matching symbols on adjacent rows and reels.
During random spins, the slot software can unleash modifiers to the reels, potentially increasing your chances of landing a big win or unlocking a bonus feature.
When multiplier symbols land and form part of a winning payline or cluster, they can magnify your winnings by the multiplier shown e.g. 2x, 5x, or 10x.
Many of the best online slots with real money payouts feature the Cascading Reels game engine. In these slots, symbols involved in winning paylines disappear from the reel grid, leaving gaps for symbols to fall into from the rows above. This makes it possible to create multiple winning paylines from a single spin.
Some real money slots also include a Gamble option that you can trigger after any winning spin. This double-or-nothing game lets you risk your payout in a guessing game – usually picking the correct card suit or color.
It’s also possible to buy directly into a slot’s bonus features. This comes at a significant cost, though, usually 50x-100x your usual stake per spin.
Best Online Slots Developers in the USA
The five following slot developers are responsible for some of the best slots to play online for real money. They’ve got a wealth of in-house talent that designs and builds engaging slot concepts to capture your imagination.
- Betsoft – For the best part of two decades, Betsoft has been designing immersive slot games, featuring some of the most popular slot mechanics, including Hold & Win. It is often featured on new online casinos and on established platforms with loads of experience.
- Real Time Gaming – Realtime Gaming (RTG) has a portfolio of 300+ new and classic slot games, spanning iconic slot themes that celebrate ancient history and regional culture, as well as progressive jackpot slots.
- NetEnt – This Swedish slot powerhouse, now part of the Evolution Gaming Group, has been responsible for some of the most popular real money slots of all time. They are the brains behind the cosmic-themed Starburst and the first genuine slot protagonist in Gonzo’s Quest.
- Dragon Gaming – Dragon Gaming is one of the most popular international slot developers, releasing their colorful real money slots in over 25 languages and available in 25 currencies, including cryptocurrencies. They also have their fingers firmly on the pulse of popular trends in slot gaming, with a wealth of seasonal and pop culture slots in their portfolio.
- Play’n GO – This Scandinavian slot supplier has over 400 premium real money slots within its suite of games, including some of the most played games in iGaming history, namely Rich Wilde and the Book of Dead. Today, its online casino slots are licensed in 35+ jurisdictions worldwide.
Banking Methods for Real Money Slots
Many of the best online slot sites now let you fund your sessions using a variety of payment options to suit your needs. Let’s explore the five most popular methods, both for deposits and payouts.
Credit and Debit Cards
Credit and debit cards remain a quick and convenient way to fund real money slots accounts. Visa, Mastercard, and American Express cards are widely accepted and trusted by online slot sites. The downside is that you must disclose the card details linked to your bank account. Payouts can also take longer to receive than some alternative options.
Cryptocurrency
Cryptocurrencies are the next-generation payment option for playing real money slots online. They are faster, more private, and borderless, allowing for practically anonymous transactions and much faster payouts via blockchain technology.
Some of the best slot sites even commit to exclusive bonuses for crypto depositors. Plus, you can benefit from fast processing on instant withdrawal casinos and get your winnings out within a few hours.
eWallets
Virtual wallets like Skrill, PayPal, and Neteller are a useful alternative payment option for playing real money slots. Unlike debit cards, you don’t have to disclose any card or bank account details. Use your bank account to fund your eWallet, and then deposit funds from your eWallet that has no direct links to your bank details. Payouts tend to be faster to eWallets than debit cards, too.
Wire Transfer
Bank wire transfers are one of the oldest and safest methods of transferring money to play real money slots online. However, they are also one of the slowest options. Deposits and payouts can take anything from two to five business days to clear. Wire transfer fees are also significantly higher than other methods.
Prepaid Cards
Prepaid card options like Paysafecard are another useful method for budget-conscious slot enthusiasts. They let you control your deposits by only funding what’s been preloaded onto their cards, without exposing your personal financial data online.
How to Maximize Your Experience With The Best Slots
The best slots to play online for real money require little in the way of skill or experience, but it is still possible to approach them with a strategy – these are our tips to keep in mind each time:
- Practice with free games: Many real money slots casinos give you the option to try some of their best online slots out for free, before you commit with real money. Jump on this opportunity, as it’s your best chance to learn how the particular slot games operate. You can learn how to win at slots, what their multipliers are like, how often they payout, and what the free spin bonuses are like from the free play option.
- Manage your bankroll: The great thing about playing with slots is that you can win a lot with very little. However, slots can be enticing, so it’s important to put a cap on how much you can spend over a week or a month. Even if it’s as strict as $5 a week, you can still make something with that.
- Build up the small wins: In an ideal world, you walk right into a slot game and win the $10,000 jackpot off the bat. Unfortunately, slots don’t work like that, realistically. You need to build up your small wins and aim for the small jackpots to walk away with significant winnings. That’s the realistic and smart way to approach slots.
- Take part in special promos: The best online casinos for slots will reward you long after you have claimed the initial welcome bonus. Special promos are a great way to boost your account balance whilst trying some of the best video slot titles on the market.
Best Online Slots USA: Summary
Slot games can be a lot of fun, and oftentimes, they don’t require a huge financial investment. The slot games we highlighted above are among some of the best you’ll find anywhere, and they can only be found on the great online casinos we highlighted above.
So, we recommend reading our insight and choosing one to try for yourself – if you are new to a casino you can also add in a great welcome bonus as well. Have fun but remember to always gamble responsibly.
FAQs
Do online slots pay real money?
Yes, when you play at the best slot sites and wager your own money per spin, you’ll have a chance of landing winning spins, unlocking bonuses, and triggering big-money jackpots.
What are the odds of winning on real money slots?
The probability of winning online casino slots depends on the volatility and Return to Player (RTP) percentage of each game. The lower the volatility, the more frequently a slot should pay out. The higher the RTP, the more of your stake you can expect to receive back over the long term.
How do I find the best real money slots online?
Your first port of call should be to visit any of the best online slot sites listed at the top of this page. These online casinos have been tested and ranked based on the caliber of real money slots available at your fingertips.
Can you legally play slots online for real money in the USA?
Yes, you can legally play slot games that pay real money in the United States. Simply check out the featured international casinos and get started right now. You are free to visit online slot sites licensed offshore, even if online gambling isn’t formally legalized where you live.
Are the best real money slots rigged?
Absolutely not. In fact, the best slot sites are independently audited to prove the fairness and authenticity of their slot results. These auditors certify that a casino’s slots are 100% random and free from manipulation.
Where to play online casino slots?
We’ve road-tested the best online slot sites and listed our top-rated operators at the top of this screen, so you don’t even have to leave this page to get your hands on casinos that specialize in the best slot game experiences.