How much time I’ve spent on League of Legends | The How-to Guide
Have you ever asked yourself the question: how much time have I spent on LoL? Here are ways to find out!
- 1. How to find out how much time I spent on League of Legends
- 2. Wasted on LoL
- How to use WoL.gg
- Is Wol.gg accurate?
- 3. Secondary tools to find out how much time you have spent on LoL
- Wastedtime.io
- OP.GG
- LeagueOfGraphs.com
- 4. Looking for other sites to help you improve, aside from coaching?
- 5. What is the average amount of time a person plays LoL for?
- 6. How much money have I spent on League of Legends?
- 7. How much time I've spent on LoL FAQs
How to find out how much time I spent on League of Legends
You used to be able to check your play time in League of Legends directly within the game client. Riot Games removed this feature in 2024, and to get the total of hours you have ever spent on LoL, you will have to go for third parties who offer this service.
Below is a list of viable services you can try out and get the information you need.
Wasted on LoL
Finding out how much time you spent on LoL is quick and easy, simply head into Wasted on LoL (wol.gg), select your region, and enter your summoner name to find out how much time you have spent on League of Legends.
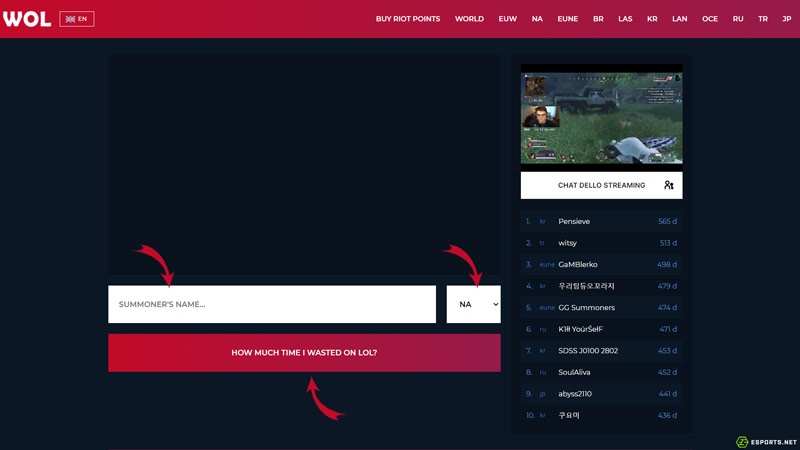
© Wasted on LoL
Wasted on LoL is easy to navigate, with minimal links and clutter. Besides, there is more to this site. On the top bar menu, you can buy RP and check the 20 top player lists on each regions, based on how much time those players have spent in League of Legends.
Wasted on LoL can cover all accounts in servers directly hosted by Riot Games. Unfortunately, this also means accounts from China, whose region is hosted by qq, are not covered.
On the downside, being a third party, Wasted on LoL might not give you a 100% accurate count of the hours played. Nevertheless, it is the closest you can get to your total hours.
How to use WoL.gg
The process is quite simple:
- On the site’s homepage, there is a tab where you must enter your summoner’s name.
- On the right side of that tab, you select your region.
- Then, just click the “How much time i wasted on LoL” button below.
After this, you will get to see how many hours you have played on LoL based on their data. The time spent playing LoL will be shown in minutes, hours and days. It will also show you your ranking position in your region and in the world. Also it will give you a nice equivalent time if you were reading book, watched movies or walked instead of play. Twitter and Facebook share buttons are also available.

© Wasted on LoL
Is Wol.gg accurate?
The short answer is no. While this site offers you the possibility of knowing your hours, it is a third party site. Therefore, you can’t be 100% sure about Wol.gg’s accuracy.
Some users have complained about it in the past, stating that they have played a lot less than the site’s results show.
We also suggest you use Google Chrome while visiting this website. We have experienced a severe slowdown with other browsers.
Secondary tools to find out how much time you have spent on LoL
In recent times, there has been an increasing number of tools to find out how much time a player has spent in League of Legends.
Wastedtime.io
You can also use wastedtime.io, which gives you more detailed information in the latest year, including how much time you spent in the individual game modes, including ARAM and normal games.
The website works just like wol.gg: type your Riot ID and wait for your result. That said, just like the former, the data might not be 100% accurate.
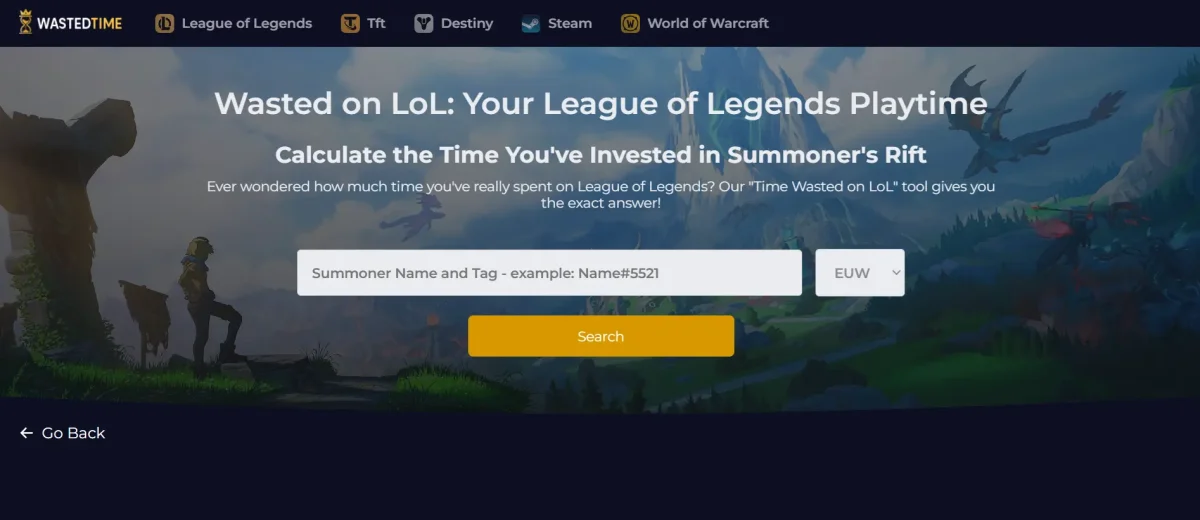
Image Credit: wastedtime.io
OP.GG
You can check your number of played games at sites such as op.gg. Find the number, then multiply that number by 30 (as 30 minutes is the average time for low-rank matches) or 25 (25 minutes is the average for top-rank matches). This way, you will get an average idea of how many hours you have spent in-game.
Another way to get an estimate of your number of played games is to divide your total mastery points and then divide the result by 650. This way, you don’t have to use sites like op.gg to give you a number.
The downside of this method is that it will only give you a rough estimate, and it might be quite a bit off from the one calculated by third-party tools. If you just need a ballpark, though, it’s more than enough.

© OP.gg
Another tool that is sometimes used is lolvalue.com, although the estimates don’t seem to be accurate since there is a large discrepancy for the top leaderboard. For example, the no. 1 player, Nolife Fynn#EUW, who has 1832 days on wol.gg, is recorded at 3523 days on lolvalue. That would be basically almost 10 years spent on the game, without switching it off!
LeagueOfGraphs.com
LeagueofGraphs is another site where you can input your Riot Games ID and get all the data about your account, play time, as well as recent game performances and metrics. You can use this site to get information about Champion Builds, Meta Breakdowns and specific Item Builds.

Credit: LeagueofGraphs.com
Using it in conjunction with the other three services listed above, you can estimate fairly accurately what your expect time wasted on LoL is and how many hours you have played.
Looking for other sites to help you improve, aside from coaching?
Surprisingly, despite the growing competitiveness of the League of Legends esports scene, the pro players are nowhere to be seen in the top-boards for spent hours. This means that simple practice and play does not directly translate to success. After all, we all know of the term hard stuck, where you fail to gain any progress despite years of play.
Improving without the use of expensive coaching is both practical and simple with the various sites and programs available. Mobalytics, in particular, provides frequently updated patch tier lists and also offers a program to give tailored guided support in-game.
The analytics from the Mobalytics will undoubtedly aid in steering you towards victory. The aid from Mobalytics doesn’t stop simply on Summoners Rift, the app/site also covers all things team fight tactics and legends of Rune Terra.
On the other hand, despite LoLKing being dead, you can use similar sites like op.gg to easily improve your game. Op.gg makes it easy to view item build paths and masteries from any player, including your favorite League of Legends YouTubers and streamers.
So, even though it is highly unlikely that you will get the same success by following the same build paths and masteries, in specific match-ups having this intel will be sure to provide an advantage. This is especially good for new players who lack the time to spend hours watching pros or streamers to improve.

© Riot Games
What is the average amount of time a person plays LoL for?
According to statistics released by Riot Games, the average League of Legends player spends 832 hours on the game. This translates to almost 35 days straight. Given this number takes into account new players as well, it is likely veterans in the game may well exceed this, having played league for hundreds of days.
How much money have I spent on League of Legends?
If you want to know how much money you have spent in League of Legends, all you need to do is follow this link. Here you sign in and get the balance of your spent cash in your current region – This is a Riot support link, so all the information is accurate and only you can access it through your account.

© Riot Games
How much time I’ve spent on LoL FAQs
Is it possible to see how much time I’ve spent on League of Legends?
Yes, it is possible! Follow the step-by-step guide above to see your in-game hours.
How can I check my total playtime in League of Legends?
There are several ways to check your playtime. If you want the most accurate one for your ranked games, use the in-game client. If you’re looking to find out the total amount of time spent, use third-party tools like wol.gg or wastedtime.io.
What tools are available to track my League of Legends playtime?
Wasted on LoL (wol.gg) and Wastedtime (wasted.io) are currently the most popular tools to calculate the time spent on LoL. By entering your Riot ID on the websites, they will provide you with an estimate of your total playtime.
How much time is too much to spend on LoL?
There is no definite answer as the days of people judging you for spending time on your favorite game are no longer a thing (unless that person is a boomer). To become a top-rated player, mastering any game, including League of Legends, requires long commitment and thorough study and practice. Don’t be ashamed of how much time you spent on LoL and just enjoy the game!
Can I earn money playing League of Legends?
Professional playing is probably beyond the skill level of most players, but that doesn’t mean you can’t make money. There are a lot of ways to make money, including using your knowledge and skills to make bets, enter tournaments, and engage with the community.
Riot Games’ in-game client only tells you how much time you have played in ranked.
The best way to find out how much time you wasted on LoL is by using third-party tools like Wasted on LoL (wol.gg) and WastedTime.io.
The player who wasted the most amount of time in LoL is Nolife Fynn#EUW with 1832 days (updated as of April 16, 2025, data taken from wol.gg).
The average time wasted by a LoL player is 832 hours (around 35 days of life).
The average daily time spent on LoL ranges from 1 to 2 hours, depending on the schedule, according to users in game forums. Hardcore gamers can go up to 8-10 hours a day.