Esports News
ARCHIVE
September 23, 2025
Gaimin Gladiators returns to CS2 with full Brazilian roster
Canadian esports organization Gaimin Gladiators dipped into the Counter-Strike 2 (CS2) esports scene in April 2024 with an all-Danish roster that lasted less than a year. Fast forward a few…

September 23, 2025
VALORANT Champions Paris Playoffs Matches Set After Huge Upsets
As the dust settles over the grueling VALORANT Champions Paris group stage, eight teams have advanced to playoffs. With a double-elimination bracket looming, the remaining teams share the same initial…
September 23, 2025
GRID Acquires Bayes Esports Assets Following Liquidation
GRID has announced that it has acquired Bayes Esports assets following the company’s liquidation. Bayes went into administration in May this year, and a court in Germany declared the company…

September 22, 2025
Peanut to take a step back from pro League of Legends for military service
Han “Peanut” Wang-ho, the prolific jungler for Hanwha Life Esports, has announced that he will have to take a step back from the pro League of Legends scene as he…
September 22, 2025
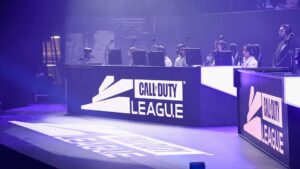
Sources: Call of Duty League Consider Trialling 8-Team Major in 2026
The Call of Duty League (CDL) is reportedly considering hosting one of its 2026 Majors with just eight teams instead of all 12, according to our sources. The CDL has…

September 22, 2025
MidOne makes pro Dota return with MOUZ after almost 2 years out
The post-The International 2025 roster shuffle is in full swing, and MOUZ have revealed a brand-new Dota 2 roster, which includes the return of Yeik “MidOne” Nai Zheng, who has…

September 22, 2025
NAVI Secures First CS2 Trophy of 2025 at StarLadder StarSeries Fall in Budapest
NAVI has won its first CS2 trophy of the year after defeating Ninjas in Pyjamas (NIP) 2-0 in the grand final of StarLadder StarSeries Fall 2025. The tournament took place…

September 22, 2025
FURIA finally lifts S-Tier Counter-Strike trophy at FISSURE Playground 2
Years in the making, Brazilian esports organization FURIA has finally won an S-tier event in Counter-Strike, as they lifted the FISSURE Playground 2 trophy. First created on August 10, 2017,…
September 22, 2025
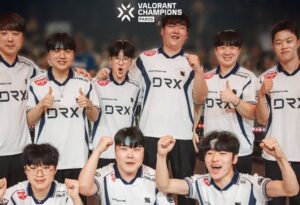
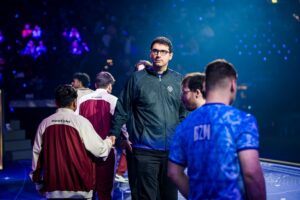
GIANTX and DRX Earn Valorant Champions Paris Spots as Defending Champs Fall
The VALORANT Champions Paris group stage has delivered on all fronts at the Les Arènes venue, delivering bangers aplenty, including a record-tying comeback from NRG, and underdogs such as MIBR…
September 20, 2025
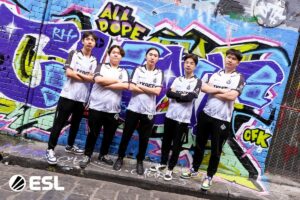
FISSURE Playground 2 Quarter-Finals: The MongolZ Eliminate G2 as Liquid, FURIA, and Falcons Advance
The FISSURE Playground 2 playoffs are now underway, and the quarter-finals featured shocks aplenty as Liquid continued its surprise run and G2 Esports was eliminated by The MongolZ. The MongolZ…
September 19, 2025
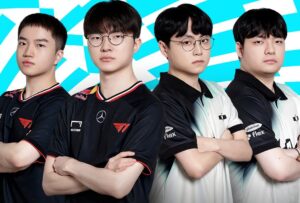
Faker’s T1 Clinch Worlds 2025 Spot with Dplus KIA Heading to the ASI
Faker’s T1 secured yet another League of Legends World Championship appearance after a 3-1 comeback win over Dplus KIA in the LCK 2025 playoffs. In the lower bracket of the…

September 19, 2025
Team Heretics and Fnatic Top Groups at VALORANT Champions Paris
EMEA juggernauts Fnatic and Team Heretics both made it through to the VALORANT Champions Paris Playoffs after topping Group B and D, respectively. The other two teams representing the region,…
September 19, 2025
Tundra Shakes Up Dota 2 Roster, Saksa Steps Away and Crystallis Benched
Tundra Esports’ Dota 2 team has revealed two major changes, with Martin “Saksa” Sazdov and Remco “Crystallis” Arets both leaving the active roster. After a disappointing 7th-8th place finish at…

September 18, 2025
Sports Betting Now Legal In California and Texas, Says Kalshi
Prediction market platform Kalshi is advertising that sports betting is now legal in California and Texas. The company, which allows users to bet on almost anything, including major esports competitions,…

September 18, 2025
The MongolZ Face G2 Esports in Blockbuster QF at FISSURE Playground 2
G2 Esports will face The MongolZ in a blockbuster matchup in the FISSURE Playground 2 Quarterfinals. The opening stages started with a bang, with the Swiss stage commencing with the…
September 18, 2025
VALORANT Champions Paris: Paper Rex & NRG Advance With Stunning Comebacks
Paper Rex and NRG have both qualified for the Champions Paris playoffs after big reverse sweep victories to send them into the tournament’s latter stages. VALORANT Champions Paris’ Group Stage…

September 18, 2025
Riot Bans 40,000 VALORANT Bots, Unleashes Replay System
Developer Riot Games has taken a little victory lap in the VALORANT 11.06 patch notes, as its Global Community Manager, Ashley Tsao, announced that developers had banned 40,000 bots over…

September 17, 2025
GRID Expands Esports Betting Offering with GRID Bet
GRID, an official esports match data and technology platform, has announced an expansion of its betting division, GRID Bet. The company aims to utilize its relationship with industry leaders such…
September 17, 2025
League of Legends Fans Rejoice: ASI 2025 Brings LCK, LPL, LCP Action Before Worlds
The League of Legends Asia Invitational (ASI) has been announced, bringing top-tier action from the LCK, LCP, and LPL regions to an online event in October. League of Legends (LoL)…

September 16, 2025
Falcons Force CS2 Academy Roster Announced with Coach NaToSaphiX
Team Falcons has announced the creation of “Falcons Force”, a Counter-Strike 2 academy team packed with “the most promising talents.” The Saudi Arabian esports organization’s main squad is one of…
September 16, 2025
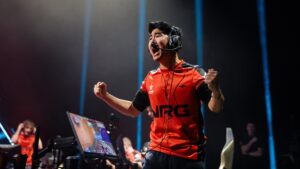
NRG Make Record Comeback Against EDward Gaming at Champions Paris
In the opening match of Group C at VALORANT Champions Paris, NRG pulled off a massive comeback against EDward Gaming (EDG), tying for the current record at VALORANT Champions Tour…
September 16, 2025
The International Heads Back to Shanghai For 2026
Ahead of the nail-biting Grand Final at The International 2025, Valve announced that The International 2026 will return to Shanghai, China. And it’s perfect timing. At TI14, fans witnessed the…

September 16, 2025
Aui_2000 is the First Person to Lift the Aegis of Champions Three Times
Team Falcons stunned Chinese powerhouse Xtreme Gaming in the Grand Finals of The International 2025, winning the last two games in the best-of-five for a final score of 3-2. The…

September 16, 2025
GamerLegion Announces the Benching of Kursy, Signs hypex to Replace Him
GamerLegion has announced that Jeremy “Kursy” Gast will be departing its active Counter-Strike 2 roster after just two months, in favour of 21-year-old Polish AWPer, Milan “hypex” Polowiec. hypex becomes…

September 16, 2025
Twistzz Set to Leave Team Liquid and Join FaZe Clan After FISSURE Playground 2
Team Liquid has announced that its star player, Russel “Twistzz” Van Dulken, is set to leave the organisation after FISSURE Playground 2. The team is currently playing in the event…